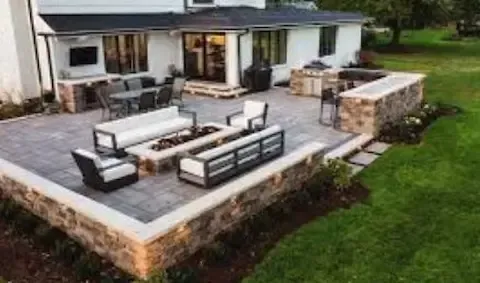
Fall Hardscape Maintenance Steps for Suffolk VA Homes
Fall hardscape maintenance in Suffolk, VA means cleaning surfaces, refreshing polymeric joint sand, sealing pavers or concrete, and protecting drainage before winter arrives. Hampton Roads winters are mild but unpredictable — freezing rain and overnight frost cycles stress mortar joints and unsealed surfaces more than people expect. Complete these steps in October or early November before ground temperatures drop below 50°F, which is the minimum threshold for most sealers to cure properly. Doing this work annually adds years to your patio, walkway, and retaining wall investment.
Step 1: Clear and Clean All Hardscape Surfaces
Remove furniture, planters, and any debris sitting on your patio or walkway. Suffolk's tree canopy drops heavy loads of oak leaves and pine needles in October, and organic material left on pavers breaks down into acids that stain and degrade surface finish over winter. Use a leaf blower first, then sweep firmly. For mold, mildew, or algae — common in Hampton Roads humidity — apply a diluted white vinegar solution or a commercial efflorescence cleaner and scrub with a stiff brush. Rinse thoroughly and allow surfaces to dry completely before moving to the next step. Do not skip the drying period. Sealing wet pavers traps moisture and causes long-term damage.
Step 2: Inspect Joints, Edges, and Wall Faces
Walk every section of your hardscape slowly. Look for joint sand that has washed out, leaving visible gaps between pavers. Check edging restraints along walkway borders — if they have shifted or heaved, reset them before winter. On retaining walls, press along the face of each block and look for any that rock or have cracked mortar. In Suffolk neighborhoods near waterways like Lake Kilby or the Nansemond River, drainage pressure behind walls builds faster than in inland areas. Catch compromised blocks now. A loose wall face that freezes and thaws repeatedly through December and January can fail entirely by spring.
Step 3: Refresh Polymeric Joint Sand
If your inspection revealed washed-out or crumbling joint sand, this is your most important fall repair. Polymeric joint sand locks pavers together, prevents weed germination, and reduces insect entry points. Sweep dry sand into all open joints using a push broom, working in multiple passes until joints are filled to within one-quarter inch of the paver surface. Compact lightly with a plate compactor if you have one. Then activate the sand by misting with water — follow the manufacturer's instructions for your specific product. Allow it to cure fully. Do this step before sealing. Sealing over empty joints accomplishes nothing structurally. For professional-grade joint repairs, see our our permeable paver write-up for guidance on drainage-compatible systems.
Step 4: Apply Sealer to Pavers and Concrete Surfaces
Sealing is your primary defense against freeze-thaw damage, oil stains, and surface erosion through winter. In Suffolk's climate, a wet-look or matte acrylic sealer applied every two to three years is standard for brick and concrete pavers. Confirm the air temperature is above 50°F and rain is not forecast for at least 24 hours — check the Hampton Roads forecast carefully in late October and November when weather turns quickly. Apply sealer with a pump sprayer or roller in thin, even coats. Two thin coats outperform one heavy coat. Avoid puddling in low spots, which creates a whitish haze as it dries. Natural stone like bluestone or travertine requires a penetrating sealer rather than a topical one — using the wrong product can discolor the surface permanently.
Step 5: Address Drainage Before the First Freeze
Standing water near hardscape is the single biggest cause of winter damage in Hampton Roads. Water that pools against a patio edge or wall base freezes, expands, and lifts material. Clear all French drains, channel drains, and downspout extensions connected to or adjacent to your hardscape. Make sure surface grades still direct water away from your home's foundation. If you notice a low spot that has developed over the season — common in Suffolk's sandy loam soil as it settles — address it now with a sand-set adjustment rather than waiting until spring when damage has already occurred.
Step 6: Store or Protect Outdoor Accessories
Bring in or cover anything that can trap moisture against your hardscape surface. Rubber furniture feet left on pavers all winter create staining rings. Fire pit covers left unsealed rust and leave iron oxide stains on concrete. If you have an outdoor kitchen countertop in natural stone, apply a stone-specific protectant and cover it. In Suffolk's western districts farther from the moderating effect of the Chesapeake Bay, overnight lows occasionally reach the mid-20s, which is enough to crack unprotected ceramic tile grout on outdoor kitchen surfaces. Take fifteen minutes now to cover and protect those investments properly.
Step 7: Schedule a Professional Review if Needed
If you found significant wall movement, large areas of failed joint sand, sunken paver sections, or drainage problems you cannot trace, fall is the right time to get a professional assessment — not spring when the damage is done. Hardscaping professionals familiar with Hampton Roads soils and drainage patterns can identify structural issues before they become costly failures. Early-season scheduling in October also gives you better contractor availability than the spring rush. A one-hour site review can save thousands in repairs by catching problems while they are still straightforward to fix.
